Choosing the Right Screen for Screen Printing
When printing T-shirts, you need to choose a screen that is right for the image you are printing. There are a few choices you have to make: aluminum vs. wood, screen size, and mesh count.
Should I use wood or aluminum?
Other than ease of construction, there is only one advantage to using a wood screen: price. A lot of suppliers don't even offer them anymore, or are clearancing them out at cheap prices. Aluminum screens are more rigid than wood, and won't warp. When aligning multiple screens for a multi-colored T-shirt job, warping screens could make alignment impossible. Ink is also easier to wipe off of aluminum as it won't absorb any of it. However, if you are going to make your own screens, wood is easier to use and is what we show in the instructions on the "stretching your own screens" page.
Screen sizes
There are two considerations when determining what size screen to use. First, how big is your image? Second, will it fit on your screen printing press? The standard outside dimension of T-shirt printing screens is 20 x 24 inches. It will fit most designs and will fit on all printing presses. If you need to go larger for a big design, make sure that multiple large screens will not hit each other when positioned side by side on a press. The press featured on our Printing Press Site can hold screens larger than 20 inches wide, but not more than two at a time. Wide screens can be placed across from each other on a press so as to not conflict.
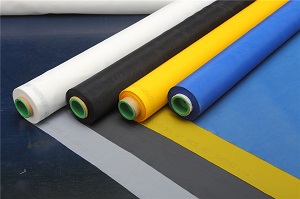
Choosing the right mesh count
"Mesh count" refers to the number of threads per inch in a screen. The count can range from 16 threads per inch to over 400. Generally, bold and simple images go on low-numbered screens, complicated and detailed designs go on high-numbered screens.
Below are four design examples and the mesh count used for printing. Keep in mind that there are a number of intermediary meshes (200, for instance), but I have chosen four that show the wide range of possibilities 83, 110, 230 and 305:
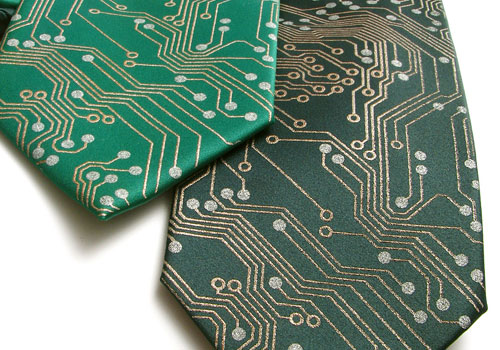
83 Mesh Count: The above Circuit Board Tie has been a big success and is featured on web sites such as Think Geek. Note that the widest part of the tie is 3.5 inches so you can judge how thick these lines are. Although the design is fairly detailed, in order to use metallic inks I needed to use a very low mesh, such as an 83. I was able to use a 110 with some success, but it became easier when lowered to an 83. Any more detailed on such a low mesh and the linework would lose its detail and corners.
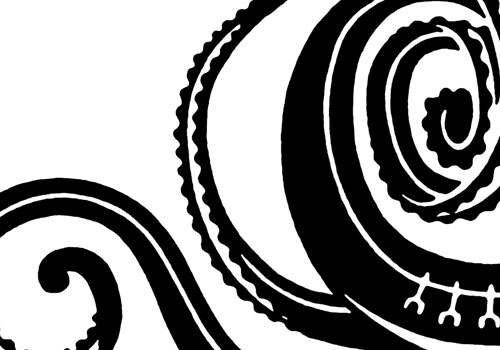
110 Mesh Count: Above is a detail of my tattoo octopus design. Depending on your monitor resolution, this is approximately lifesize. There is no small detail work, so it is ideal for about a 110 mesh. See the octopus shirt below:

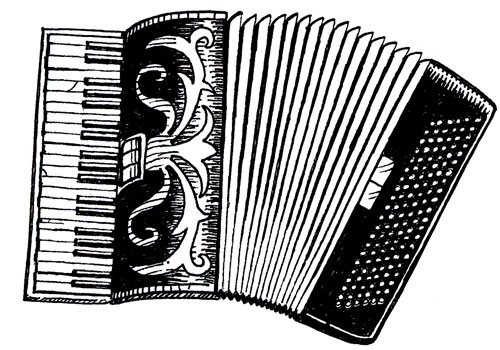
230 Mesh Count: Above is the accordion from the Instruments of War T-shirt design. Depending on your monitor resolution, this is approximately lifesize. There is some fairly small detailed work, but it's bold enough that it still works without resorting to a higher mesh.
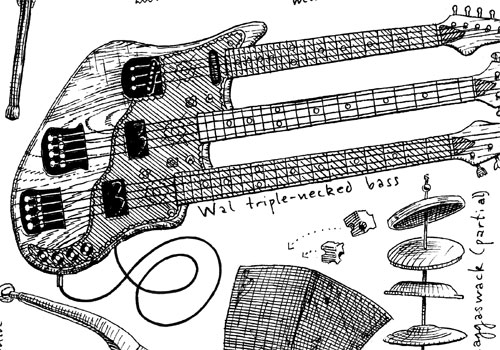
305 Mesh Count: Above is a detail from the Instrumental Oddities T-shirt design. Notice what kind of extreme detail is possible even on a shirt!
Other mesh count considerations
As illustrated above, the higher the mesh count, the more detail that's possible. However, higher mesh counts put LESS INK through the screen per squeegee pull. That means that images will appear lighter, but this can be corrected by using multiple passes of the squeegee until the design is the desired value (darkness). The above "Instrumental Oddities" shirt takes 3 squeegee passes for proper contrast. For this reason, light inks on dark shirts work better on lower mesh counts because they require thicker ink. Still, multiple squeegee pulls or a print, flash, print method (explained later) can make light-on-dark printing possible even with detailed designs.